
Container Gardens
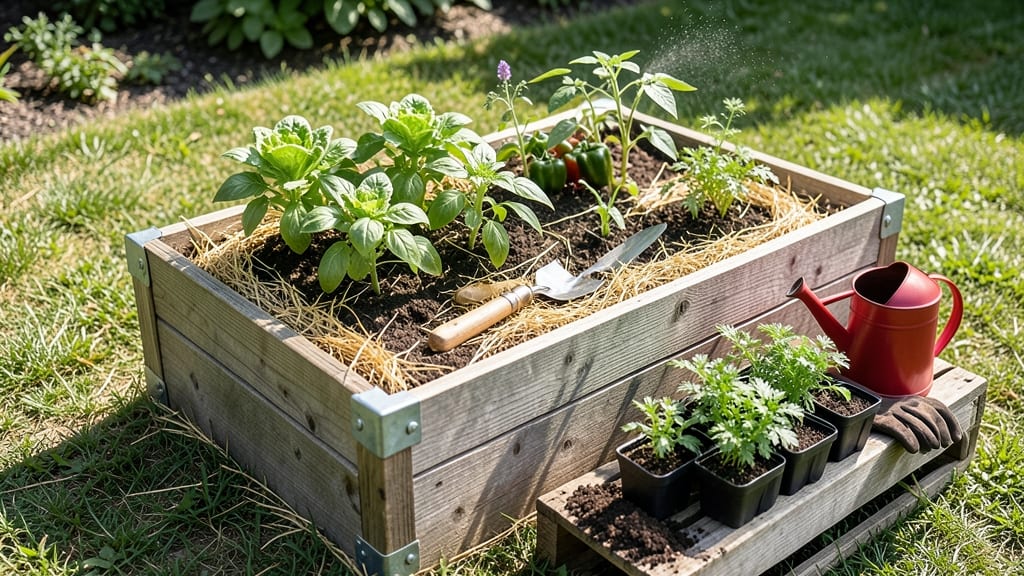
Portable raised garden beds let you grow fresh veggies and herbs anywhere—no permanent setup required.
Imagine transforming any outdoor space—balconies, patios, or even your driveway—into a thriving garden with minimal effort. These beds offer flexibility, mobility, and year-round growing potential without the hassle of permanent installations.
Whether you're dealing with limited space or want to rotate crops easily, they’re the easiest way to garden on your terms.
From lightweight cedar to durable composite lumber, the right materials make moving your beds a breeze while ensuring they last for years. You’ll also discover clever designs like foldable or stackable options, perfect for small spaces or urban gardening.
The best part? No heavy lifting or digging—just roll them into place and start planting.
In this guide, I’ll break down the best materials for mobility, step-by-step building tips, and creative designs to maximize your space. Whether you're a beginner or a seasoned gardener, portable raised beds make growing easier and more fun than ever.
Best lightweight materials for portable raised garden beds
Choosing the right material for your portable raised garden bed is crucial for balancing mobility and durability. You need something lightweight enough to move but strong enough to last through multiple growing seasons.
My top recommendations include cedar, composite lumber, recycled plastic, and metal, each offering unique benefits for different gardening needs.
Lightweight materials solve the biggest challenge of portable beds—easy movement. A bed filled with soil can weigh 200-500+ pounds, depending on size. The wrong material will make your bed feel like a cement block. Let’s explore the best options to keep your garden flexible and manageable.
Here’s a detailed comparison of the top lightweight yet durable materials for portable raised beds, including cost, maintenance, and performance.
| Material | Weight (per 2x4x8') | Durability (1-10) | Cost (per board) | Maintenance | Best For |
|---|---|---|---|---|---|
| Cedar | 30-35 lbs | 8/10 | $6-$12 | Seal yearly | Natural look, rot-resistant |
| Composite Lumber | 35-40 lbs | 9/10 | $10-$20 | Low (weatherproof) | Low maintenance, termite-proof |
| Recycled Plastic | 25-30 lbs | 10/10 | $15-$30 | None | Ultra-light, eco-friendly |
| Metal (Galvanized) | 40-50 lbs | 7/10 | $8-$15 | Rust check | Industrial strength, weatherproof |
Cedar is my go-to for traditional gardeners. It’s naturally rot-resistant and lightweight, making it perfect for DIY projects. A 4’x8’ cedar board weighs just 30-35 lbs, and its natural oils deter pests. The downside? You’ll need to reseal every 1-2 years to maintain its beauty and prevent cracking.
Composite lumber is a game-changer for those who hate maintenance. Made from recycled wood fibers and plastic, it won’t warp, rot, or attract termites. It’s slightly heavier than cedar but offers 10+ years of durability without sealing. The higher upfront cost is worth it if you want a set-it-and-forget-it solution.
If you’re looking for the lightest option, recycled plastic beds are unbeatable. They weigh 30% less than wood and never crack or splinter. Plus, they’re eco-friendly since they’re made from post-consumer materials. The only downside? Limited design options compared to wood.
Metal beds are ideal for urban gardeners with limited space. Galvanized steel is rust-resistant and can last decades, but it’s the heaviest option. To keep it mobile, opt for thin-gauge metal (16-18 gauge) and add heavy-duty casters. Paint it to prevent heat absorption, which can cook plant roots in summer.
For budget-conscious gardeners, cedar is the best value. It’s 30-50% cheaper than composite or plastic but requires more upkeep. If you’re willing to invest upfront, recycled plastic or composite lumber will save you time and hassle in the long run.
Pro tip: Pair your material choice with reinforced bases or casters to ensure smooth movement. A 4’x8’ bed filled with soil can weigh 500+ lbs, so mobility hinges on both material and design.
No matter which material you choose, prioritize drainage holes and weather resistance. Your plants—and your back—will thank you for the thoughtful investment.
How to build a sturdy and mobile raised garden bed
Portable raised garden beds are a game-changer for gardeners who need flexibility without sacrificing stability. Whether you're dealing with limited space or want to rotate crops easily, a mobile raised bed lets you move your garden to the perfect spot.
The key is balancing durability with ease of movement, and it all starts with the right design. I’ll walk you through the essential steps to build a bed that’s both sturdy and mobile, so you can enjoy fresh produce without the hassle of permanent installations.
First, consider the foundation and materials—lightweight yet strong options like cedar or composite lumber work best. Add reinforced bases with casters or handles to ensure smooth mobility while keeping the bed stable. Don’t forget drainage solutions like gravel or perforated pipes to prevent waterlogging.
With these elements in place, your raised bed will be ready for any location, from patios to balconies, and even seasonal rotations.
Step-by-Step Guide to Building a Mobile Raised Bed
-
Step 1: Choose Your Materials
Select lightweight but durable materials like cedar, composite lumber, or galvanized steel. Cedar resists rot, while composite lumber is low-maintenance and lightweight. -
Step 2: Build a Reinforced Base
Construct a flat base frame using 2x4s or 4x4s. Add cross-bracing for stability, especially if you plan to move the bed frequently. -
Step 3: Attach Casters or Handles
Install 4 heavy-duty casters (one at each corner) or ergonomic handles on the sides. Casters make moving easier, while handles provide extra control. -
Step 4: Add Drainage Solutions
Drill drainage holes in the bottom of the bed and add a layer of gravel or landscape fabric to prevent soil from clogging the holes. -
Step 5: Assemble the Bed Frame
Attach the sides to the base using galvanized screws or corner brackets for extra strength. Ensure the corners are square for stability. -
Step 6: Fill and Test
Fill the bed with a mix of topsoil, compost, and perlite. Test the mobility by moving it a few feet to ensure it rolls smoothly and stays stable.
One of the biggest challenges with mobile raised beds is ensuring they don’t tip over when moved. To prevent this, distribute weight evenly by filling the bed with soil and plants gradually. Start with a partial fill and add more soil as you plant to maintain balance.
If you’re growing heavy plants like tomatoes or squash, consider adding weighted corners or a low center of gravity by keeping the bed’s height between 12 and 18 inches.
For added convenience, consider adding a removable lid or foldable sides to protect your plants from pests and harsh weather. This is especially useful if you’re moving the bed frequently or storing it during the off-season.
A lid also helps retain moisture and regulate soil temperature, which is perfect for seedlings or tender plants. Plus, it makes your garden look neat and organized!
Once your mobile raised bed is built, you’ll love the freedom to move it to the sunniest spot or protect it from strong winds. Whether you’re growing herbs on your balcony or vegetables in your backyard, this design gives you the flexibility to adapt your garden to changing conditions.
With a little creativity, you can even customize the bed to fit your space—think tiered designs for vertical gardening or stacked beds to maximize small areas.
Don’t let mobility compromise stability. With the right materials and design, your portable raised bed will be a durable, long-lasting solution that makes gardening easier and more enjoyable. Happy building, and here’s to a garden that moves with you! 🌱