
Picking
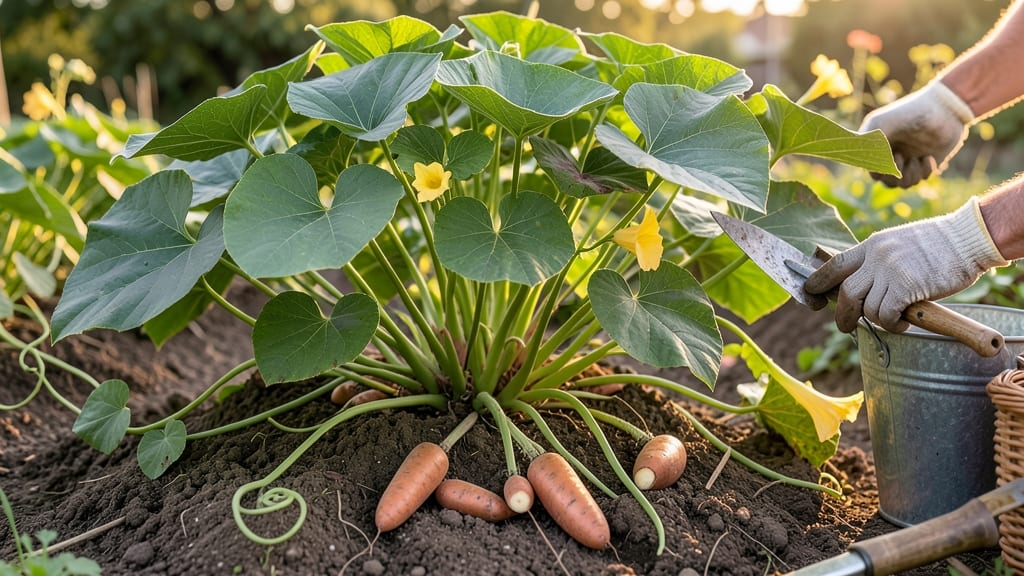
Picking sweet potatoes from the garden at the right time means the difference between tender, flavorful tubers and tough, starchy messes.
Sweet potatoes left too long in the ground turn starchy and tough, while harvesting too early means small, underdeveloped tubers—getting the timing right is everything for a perfect harvest.
Most gardeners wait for the vines to yellow and die back, but there’s a more reliable method: the skin slip test. When the skin peels back easily from the tuber, it’s time to dig.
In this guide, I’ll walk you through the best testing methods, regional adjustments for your climate zone, and how to handle post-harvest care so your sweet potatoes stay fresh longer.
How to test sweet potato maturity: the skin slip test explained
Sweet potatoes left too long in the ground turn starchy and tough, while harvesting too early means small, underdeveloped tubers—getting the timing right is everything for a perfect harvest.
The skin slip test is my go-to method to determine when these tubers are ready to dig up, and it’s simpler than you might think. This test relies on the natural changes in the skin's toughness and color, which signal maturity.
Before diving into the test, understand that sweet potatoes need 90 to 140 days to mature, depending on the variety. Most gardeners wait until the vines start to yellow and die back, but the skin slip test gives you a more precise moment to harvest.
This method works best when combined with other visual cues, like deep orange skin and firm tubers, for accuracy.
Here’s how the skin slip test works: gently brush your fingers over the soil near the plant’s base. If the skin of the exposed tuber slips easily from the soil and feels firm to the touch, it’s ready for harvest.
This happens because mature tubers develop a thicker, tougher skin that resists sticking to the soil. The test is foolproof once you get the hang of it!
Now, let’s compare the skin slip test with other methods to ensure you’re harvesting at the perfect time. Not all tubers will pass the test at the same time, so testing multiple plants gives you a better idea of when the entire patch is ready.
Below is a detailed comparison to help you decide which method works best for your garden.
| Test Method | What to Look For | When It’s Ready | Common Mistakes | Best Time to Test |
|---|---|---|---|---|
| Skin Slip Test | Skin slips easily from soil; firm texture | Tubers 2-3 inches in diameter | Testing too early (skin still soft) | Late summer to early fall |
| Vine Dieback | Vines yellow and dry up uniformly | Tubers fully matured | Confusing disease with maturity | Fall (before first frost) |
| Skin Color Change | Deep orange or reddish hue | Tubers ready for harvest | Overestimating maturity from color | Late summer |
| Finger Dig Test | Tubers feel firm when gently squeezed | Ideal harvest size | Digging too deep and damaging tubers | Late summer to early fall |
The skin slip test is especially useful in warmer climates where sweet potatoes might not show traditional vine dieback before harvest time. If you’re in a region with a short growing season, combine this test with the vine dieback method to avoid missing the harvest window.
For example, in USDA Zone 7, I always test for maturity around mid-September to ensure I don’t lose tubers to early frost.
False positives can happen if you test too early in the season. Immature tubers might slip slightly from the soil, but they’ll still be small and soft. To avoid this, wait until the vines show signs of yellowing or curling before performing the test.
This extra step ensures you’re not harvesting underdeveloped tubers that won’t store well.
If you’re growing sweet potatoes in containers or raised beds, the skin slip test is even more critical because you can’t rely on vine dieback as a clear signal. Containers dry out faster, and tubers might mature unevenly.
Test a few tubers from different parts of the container to confirm readiness. This method gives you peace of mind, especially if you’re growing space-saving varieties like ‘Beauregard’ or ‘Georgia Jet’.
Once you’ve confirmed maturity with the skin slip test, it’s time to harvest. Use a garden fork to gently loosen the soil around the tubers, then lift them carefully to avoid bruising.
Cure your sweet potatoes in a warm, humid space for about 10 days to develop their sweetness and improve storage life. This step is just as important as testing for maturity!
Remember, the skin slip test is all about touch and observation. The more you practice, the easier it becomes to recognize the perfect moment to harvest. Over time, you’ll develop a feel for when your sweet potatoes are ready, and you’ll never have to guess again. Happy digging!
Sweet potato vine dieback: when yellowing leaves signal harvest time
Your sweet potato vines are sending clear signals about harvest readiness through their leaves. When the leaves start yellowing and curling, it’s often a sign the tubers below are maturing—but not always.
Understanding the difference between natural senescence (aging) and disease or pest stress is key to timing your harvest perfectly. In my experience, uniform yellowing across the entire vine usually means it’s time to dig, while spotty discoloration could indicate a problem like fungal infection or root rot.
Frost timing plays a critical role, too. In cooler climates like USDA Zones 3-7, the first frost can trigger vine dieback, but the tubers may still be edible. In warmer zones (8-10), vines might yellow naturally without frost, so don’t wait too long.
The goal is to harvest when the vines are 50-70% yellowed, giving you tubers that are large enough to store but haven’t turned woody.
Here’s the tricky part: not all yellowing means harvest time. For example, leaf curl can also signal virus infection (like sweet potato feathery mottle virus), which ruins both the vines and tubers. Check the undersides of leaves for pale spots or webbing—signs of pests like spider mites.
If the curl is paired with stunted growth or blackened stems, it’s likely a disease, not maturity.
⚠️ Warning: Vine Dieback ≠ Always Harvest Time
Yellowing leaves can mean:
- ✅ Maturity: Uniform yellowing + dry stems = tubers likely ready (dig a test tuber to confirm).
- ❌ Disease: Spotty yellow + black spots = fungal infection (harvest immediately to salvage tubers).
- ⚠️ Pest Stress: Curled leaves + webbing = spider mites (treat with neem oil before harvesting).
Pro Tip:
After frost in Zones 3-7, vines die back fast—harvest within 1-2 weeks to avoid tuber shrinkage. In Zones 8-10, wait until 70% of vines are yellow for optimal size.
To confirm readiness, perform the skin slip test on a few tubers: Gently scrape the skin with your thumbnail. If it peels away easily, the tuber is mature. Pair this with checking vine dieback—if half the leaves are yellow and the remaining ones are crisp, it’s time to dig.
In my garden, I’ve found that harvesting at 120 days (for most varieties) aligns perfectly with these visual cues.
Don’t ignore the soil temperature either. Tubers harvested when soil temps are above 55°F cure better and store longer. If your area faces early frosts, prioritize harvesting 2-3 weeks before the first expected frost, even if the vines aren’t fully yellow.
A light frost can kill the vines but may not harm the tubers if they’ve had time to mature.
Once you’ve confirmed maturity, harvest on a dry, sunny day to let the tubers dry slightly before curing. This reduces rot risk and improves storage life. Pro tip: Use a fork to loosen soil gently—avoid piercing the tubers—to prevent bruising.
After harvest, cure them in a warm (80-85°F), humid space for 5-10 days to develop their sweet flavor.