
Picking
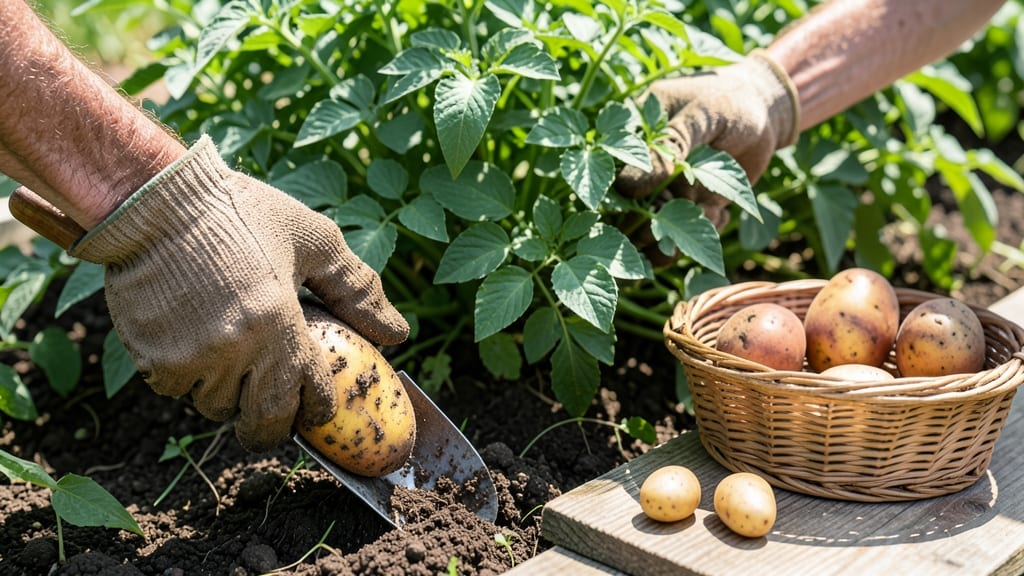
Harvesting potatoes from your garden at the right time means the difference between fluffy, flavorful tubers and tough, shrunken ones — and nailing that window takes more than just counting days.
Picture this: you dig up a potato that’s still green and mealy, or worse, one that’s already sprouting in the soil. That’s how you know timing is everything, and the key isn’t just the calendar — it’s what’s happening right under your hands.
From the moment 🥔 flowers bloom to when the foliage yellows, I’ll walk you through the three tactile tests that tell you exactly when to pull them for perfect texture and storage life.
Whether you’re growing early varieties or waiting for late-season harvests, these tricks will save you from wasted tubers and ensure every potato you dig is ready for the pot — or the pantry.
3 Tactile tests to determine when potatoes are ready for harvest
Harvesting potatoes at the right time transforms your garden into a treasure trove of flavorful, firm tubers. But how do you know when they're truly ready? Unlike fruits that ripen on the vine, potatoes mature underground, making it tricky to judge.
The key lies in three simple tactile tests that reveal their readiness through touch, sight, and a little digging. These methods work for early, mid-season, and late varieties, ensuring you never miss the perfect harvest window.
First, let’s address the biggest mistake gardeners make: harvesting by days after planting. While most potatoes take 70-120 days to mature, this varies wildly by variety. Instead of guessing, use these hands-on tests to confirm readiness.
The earlier you harvest, the smaller and mealier the potatoes will be. Wait too long, and they’ll shrivel or develop disease-prone green spots. Balance is everything, and these tests put you in control.
🌱 3 Tactile Tests for Perfect Potato Harvest
- 1 Soil Fluff Test: Gently loosen soil around the plant base. If small potatoes (new potatoes) peek through, they’re ready for an early harvest. For mature potatoes, dig deeper—if the soil feels dry and loose, it’s time.
- 2 Tuber Size & Firmness: Gently squeeze a potato through the soil. If it’s golf-ball sized (1.5–2 inches) and firm, it’s ready. For larger varieties, aim for baseball-sized (3+ inches). Thin-skinned or easily bruised potatoes need more time.
- 3 Stem Inspection: Check the foliage and stems. For new potatoes, harvest when flowers bloom. For mature potatoes, wait until the tops yellow and die back. If stems turn brown and woody, it’s a clear sign—dig immediately to avoid tuber shrinkage.
Let’s start with the soil fluff test, my favorite because it’s non-destructive and works for both early and late harvests. On a dry, sunny day, use your fingers to gently loosen soil around the plant’s base. If you spot small, firm potatoes near the surface, congratulations—you’ve found new potatoes!
These are perfect for quick meals like salads or roasting. For mature potatoes, dig deeper (6–12 inches) and check for larger, well-formed tubers. If the soil feels dry and crumbly, it’s a green light to harvest.
The tuber size and firmness test is where many gardeners go wrong. They assume all potatoes are ready at the same time, but early varieties like ‘Yukon Gold’ mature faster than late varieties like ‘Russet Burbank’.
Aim for golf-ball size (1.5–2 inches) for new potatoes, or baseball size (3+ inches) for storage varieties. Press gently—if the skin resists and the potato feels firm, it’s ready. If it’s soft or shriveled, wait a few more days.
Pro tip: Avoid harvesting when the soil is wet, as this can damage tender tubers.
Don’t overlook the stem inspection, which gives you the most reliable signal for mature potatoes. When the foliage turns yellow and the stems become brittle, it’s time to dig. This is nature’s way of telling you the plant is redirecting energy to the tubers.
For early varieties, you might harvest when flowers bloom, but for storage potatoes, wait until the tops are completely dead. If you see green spots on the tubers, they’ve been exposed to sunlight—cover them with soil immediately to prevent toxic solanine buildup.
Regional climate plays a huge role in timing. In warmer zones (USDA 8-10), potatoes may mature faster and need harvesting earlier. In cooler climates (USDA 3-6), the growing season extends, so monitor the soil and stems closely.
A sudden temperature drop or drought stress can trigger premature harvest signals—always double-check with the tactile tests before digging. If you’re unsure, do a partial harvest to test a few potatoes and leave the rest in the ground.
One common mistake is harvesting based on calendar dates rather than plant signals. For example, ‘Red Pontiac’ (a mid-season variety) might be ready in 90 days, but ‘Kennebec’ (a late variety) needs 120 days. Always cross-reference the seed packet guidelines with these tactile tests.
If your potatoes are smaller than expected, they might need more time or richer soil. If they’re oversized but mealy, you harvested too late—next time, dig when the stems start to yellow.
For container-grown potatoes, the same rules apply, but check the soil more frequently since pots dry out faster. If the soil is bone-dry, water deeply 24 hours before testing. In containers, tubers often form near the surface, so you might spot them earlier.
Always handle container potatoes with care—their shallow roots make them more susceptible to damage. After harvesting, let them cure in a dark, dry place for a week to toughen the skin and improve storage life.
Finally, remember that harvest timing affects storage. Potatoes harvested too early won’t store well and may sprout or rot. Those harvested at the right time can last 4-6 months in a cool, dark place.
If you’re planning to eat them immediately, go ahead and harvest when they’re firm and flavorful. But if you want to store them, wait until the stems are fully dead and the skin is thick. This ensures maximum shelf life and minimal waste.
Master these three tactile tests, and you’ll never second-guess your potato harvest again. The soil fluff test tells you what’s happening underground, the tuber size test confirms readiness, and the stem inspection gives you
Best harvest times by potato variety and seasonal conditions
Potatoes aren't one-size-fits-all when it comes to harvest timing—early varieties like 'Yukon Gold' can be ready in 70-80 days, while late-season types such as 'Russet' need 100-120 days.
Understanding these differences prevents wasted effort and ensures you harvest at peak flavor. New potatoes (small, tender tubers) appear 4-6 weeks after planting, while mature potatoes develop 2-3 months later.
Your local climate plays a critical role—cool, short seasons (like Zone 4) favor early varieties, while long, warm growing seasons (Zone 8+) can support late-season harvests. Drought stress can stunt tubers, while excessive rain increases disease risk, both of which shift harvest windows.
Even soil type matters: sandy soils dry faster, speeding up maturity, while clay soils keep moisture longer, delaying harvest by 1-2 weeks.
| Variety Type | Days to Maturity | Best Harvest Time | Seasonal Notes | Soil Adaptation |
|---|---|---|---|---|
| Early (New Potatoes) | 45-60 days | When flowers bloom | Cool weather; harvest before frost | Sandy/loamy |
| Mid-Season | 70-90 days | Yellowing foliage | Moderate temps; avoid drought | Loam/clay |
| Late (Storage) | 100-120 days | After full vine dieback | Warm seasons; cure before storing | Clay/well-drained |
| All Varieties | N/A | After 2-3 weeks of frost | Dig before hard freeze | Any (adjust timing) |
For new potatoes, dig when tubers are golf-ball sized (about 1-2 inches) and appear near the soil surface.
This usually happens 4-6 weeks after planting, just as the plant begins flowering. Mature potatoes, however, should wait until the plant's foliage turns yellow and dies back, signaling the tubers have fully developed. In dry climates, this can happen 2 weeks earlier than in wetter regions.
If your soil is sandy, potatoes may mature 1-2 weeks faster due to faster drying and warmer temperatures near the surface. In contrast, clay soils retain moisture longer, delaying maturity.
To adjust, monitor soil moisture—if the top 2 inches dry out quickly, your potatoes are likely ready sooner. Overwatering before harvest can lead to shriveled tubers, so reduce watering 1-2 weeks before digging.
One critical mistake is harvesting after the first frost—even if tubers look perfect, cold damage starts immediately. Instead, dig 2-3 weeks before the first expected frost and cure potatoes in a dark, 50-60°F space for 5-10 days to toughen skins.
For storage varieties, this step is non-negotiable to prevent rot. Early varieties, however, can be eaten fresh without curing.
Pay attention to regional microclimates—a hilltop may frost earlier than a valley, even in the same zone. Use a planting calendar tailored to your USDA zone and adjust harvest dates by ±1 week based on your local weather patterns.
For example, Zone 5 gardeners might harvest 2 weeks earlier than Zone 7 counterparts for the same variety. Keep records each year to refine your timing!