
Picking
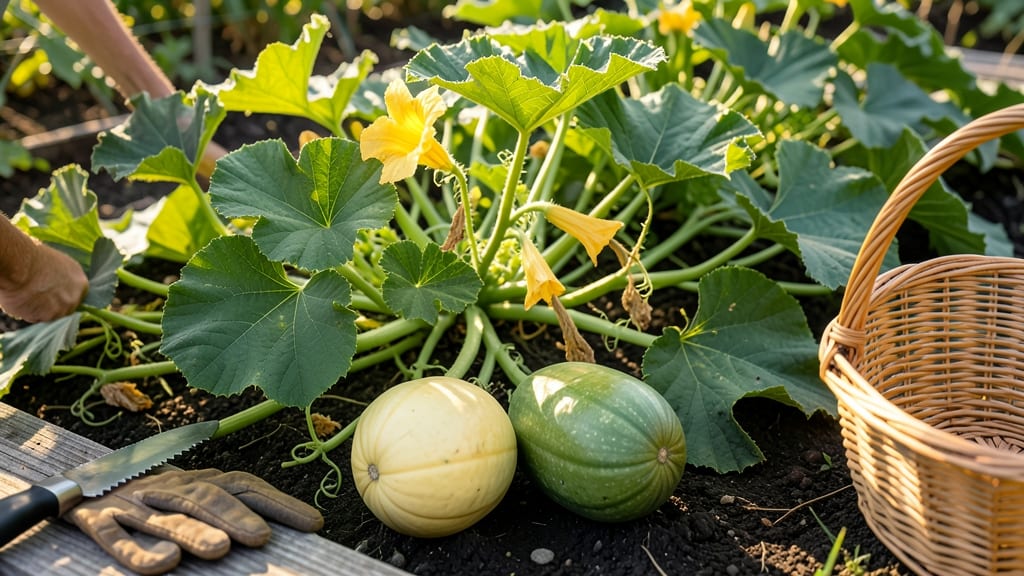
To pick spaghetti squash from your garden at the perfect time means the difference between silky strands and a tough, seedy mess—here’s how to get it right every season.
Picture this: you’ve nurtured your 🎃 for months, only to slice into a squash that’s either mushy or rock-hard. That’s why knowing the exact moment to harvest is the key to a foolproof garden.
Look for three clear signs: a dull, tan rind that’s hard to pierce, a stem that’s dried and shriveled, and vines that’ve started to yellow. These visual cues tell you the squash is ready to pull—before the first frost hits.
Below, I’ll break down how to test ripeness, what happens if you’re a day too early or late, and how to store your harvest for maximum flavor. No more guesswork—just perfect, string-free spaghetti squash every time.
3 Visual cues to identify perfectly ripe spaghetti squash
Harvesting your spaghetti squash at the right moment transforms it from a tough, fibrous mess into those dreamy, stringy strands we all love. The key? Watching for three distinct visual cues that signal peak ripeness.
Miss these signs, and you risk either a watery, underdeveloped squash or one so overripe it’s practically a rock—neither of which is ideal for your dinner table.
I’ve learned the hard way that rind color, stem changes, and squash size are the holy trinity of spaghetti squash maturity. Ignore them, and you’ll end up with a garden full of green, seedy disappointments or shriveled husks that won’t even carve.
Let’s break down exactly what to look for—and what happens if you wait too long or pick too early.
🎃 Pro Tip: Grab a notebook and jot down the date when you first spot these cues. Spaghetti squash ripens unevenly, so marking your calendar ensures you don’t miss the window.
- 1 Rind Color: Look for a dull, tan hue replacing the bright green. A ripe squash won’t be shiny or vibrant—it’ll appear matte and slightly faded, almost like it’s been kissed by the first frost.
- 2 Stem Changes: The stem should dry out and turn brown, almost like it’s papery or brittle. If it’s still green and plump, your squash needs more time. A fully dried stem means it’s ready to harvest within 2-3 days.
- 3 Squash Size: Aim for 8-12 inches in diameter. Smaller than 6 inches? It’s underripe. Larger than 14 inches? It’s overripe and likely tough. The sweet spot is when it feels heavy for its size, a sign it’s packed with those delicious strings.
🌱 Remember: These cues work best in USDA Zone 6a and warmer. In cooler climates, prioritize stem dryness over color changes.
Now, let’s talk about what happens if you wait too long. Overripe spaghetti squash becomes wooden and seedy, with strings that are more chewy than tender. The flesh also turns orange-brown instead of pale yellow, and the seeds inside grow oversized and hard.
Trust me, you don’t want to end up with a squash that’s basically a garden decoration.
On the flip side, picking too early leads to watery, stringless strands that fall apart when cooked. The rind stays soft and green, and the squash feels light for its size.
You’ll know it’s not ready if the inside looks more like mush than spaghetti—definitely not the texture you’re aiming for.
Here’s my golden rule: If two out of the three cues are met, it’s time to harvest. For example, if the rind is dull tan and the stem is drying but the squash is still 7 inches, give it 3-5 more days.
But if all three cues are present, grab your pruners or sharp knife and get harvesting before the vines completely die back.
One last tip: Harvest in the morning when temps are cooler. This preserves the squash’s freshness and sweetness longer.
Store it in a cool, dry place (like a garage or basement) for up to 2 months—just don’t refrigerate it until you’re ready to use it, or the flavor will dull.
Master these visual cues, and you’ll never again wonder "Is my spaghetti squash ready?". Instead, you’ll be serving up perfectly ripe, stringy goodness that’ll have your family asking for seconds—every single time. 🎃
How to test spaghetti squash ripeness before harvesting
When it comes to harvesting spaghetti squash, timing is everything. Unlike some squash varieties, spaghetti squash doesn’t soften as it ripens—it actually becomes harder and drier. This makes physical tests your best friend for determining peak ripeness.
I’ve learned the hard way that waiting too long turns those tender strands into tough, seedy disappointment, while picking too early means mushy, underdeveloped flesh.
Start by checking the environmental conditions first. Spaghetti squash thrives in warm temperatures between 70°F and 90°F during the day and never drops below 50°F at night. If your area experiences early frost warnings, prioritize harvesting before temperatures dip.
I always keep an eye on the 10-day forecast in late summer to plan my harvest window accordingly.
Now for the physical tests that never fail me. The first is the nail test: press your fingernail into the squash’s skin. If it doesn’t puncture easily and the skin feels tough, it’s ready.
For a more dramatic test, give the squash a gentle thump—a hollow, deep sound means it’s ripe, while a dull thud suggests it needs more time. I’ve found this works especially well when testing squash still on the vine.
⚠️ WARNING: Miss the Harvest Window? ⚠️
Overripe spaghetti squash becomes woody and seedy, while underripe squash stays soft and stringy. If your squash is too hard (like a rock), it’s past its prime—store it in a cool, dark place for up to 3 months, but expect tougher strands. If it’s too soft, try cooking it longer or storing it briefly to mature, but don’t expect perfect texture. Frost damage ruins the squash entirely—harvest immediately if frost is forecasted!
The rind color is another dead giveaway. When ripe, spaghetti squash develops a dull, tan or beige hue instead of staying bright green. Look for yellowing vines and wilting leaves—these are classic signs the plant is redirecting energy to the squash.
I always check for shriveled blossom ends (the stem end) as a final confirmation. One year, I ignored the vine signals and ended up with squash that was too fibrous to enjoy.
Don’t forget to shake the squash gently—ripe ones make a rattling sound from the seeds inside. This test is especially useful when you’re dealing with a heavy harvest and need to prioritize which squash to pick first.
I’ve used this method to sort my entire crop in under 10 minutes, ensuring I harvest the ripest ones first for immediate cooking.
Finally, consider the maturity timeline. Most spaghetti squash varieties take 80-100 days to mature, but this varies by cultivar and climate. In my Zone 6a garden, I start checking for ripeness around mid-September, giving the squash time to fully develop before the first frost.
If you’re in a warmer zone, you might have a 2-3 week extension—just adjust your tests accordingly.
Mastering these ripeness tests will transform your spaghetti squash harvest from hit-or-miss to consistently delicious. The key is combining visual cues, physical tests, and environmental awareness—that’s how I’ve gone from tough, seedy failures to perfectly tender strands every season. 🎃