
Picking
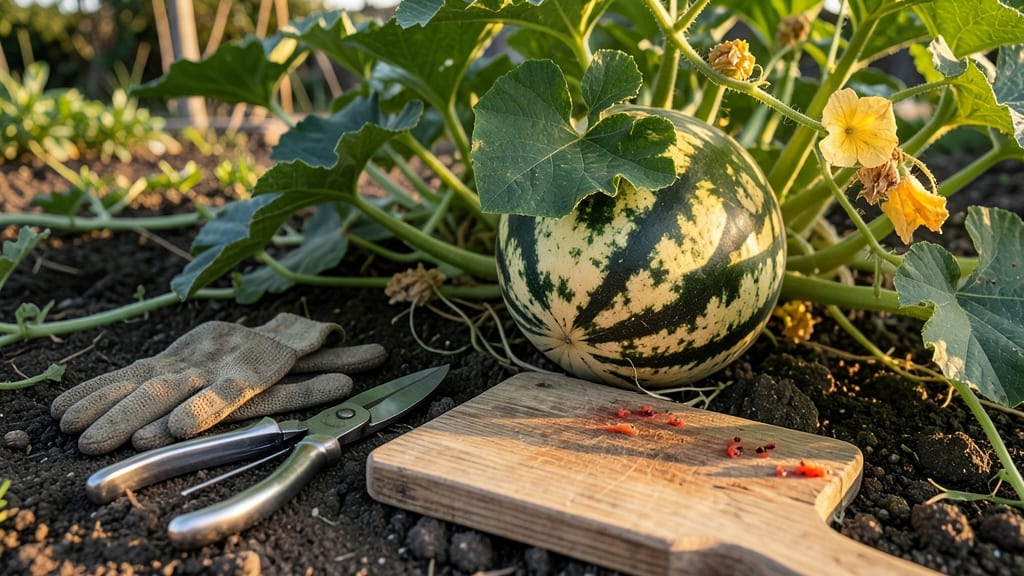
To pick watermelon from your garden at the perfect moment means sweet, juicy fruit that tastes like summer 🍉 — and waiting too long can turn that harvest into a mushy disappointment.
Picking a watermelon too early means bland, underripe fruit—but waiting too long can result in overripe mess. Mastering the perfect timing ensures sweet, juicy watermelons straight from your garden every time.
You’ve nurtured your vines through sweltering summer days and patiently waited for those first pale patches to appear. Now, how do you know when to finally cut that vine? The answer lies in three simple field tests that take just a few seconds each.
In this guide, I’ll show you how to read the rind, thump the melon, and check the tendril—plus how climate and variety tweak the timing. No more guesswork, just perfectly ripe watermelons every harvest.
3 Field tests to determine when to pick watermelon
Knowing exactly when to harvest your watermelons can feel like solving a puzzle—especially when you’ve waited months for that first ripe fruit.
The difference between a perfectly sweet watermelon and one that’s bland or overripe often comes down to three simple, science-backed field tests you can perform right in your garden.
These methods—thump test, ground spot check, and curl test—rely on visual and tactile cues that align with the watermelon’s natural ripening process.
Each test targets a different aspect of ripeness: internal seed development, nutrient absorption, and vine maturity. For example, the thump test evaluates how the seeds have hardened, while the ground spot check reveals whether the watermelon has fully absorbed nutrients from the soil.
Together, these tests create a foolproof system to avoid the two biggest mistakes: picking too early (resulting in watery, underripe fruit) or waiting too long (leading to mushy, overripe melons).
Before diving into the tests, here’s a quick tip: always harvest watermelons on a dry morning to ensure clean handling and accurate results. Use a sharp knife or pruning shears to cut the stem, leaving about 1 inch of stem attached to the fruit.
This small detail preserves the watermelon’s natural sugars and prevents premature spoilage.
The thump test is perhaps the most famous method for determining watermelon ripeness, but it’s also the most misunderstood. Many gardeners assume any hollow sound means the watermelon is ready—but that’s not always true.
A deep, resonant thud (like knocking on a wooden door) indicates the seeds have fully developed and the fruit is ripe. However, a dull thud (like hitting a pillow) suggests the watermelon is still underripe.
Pro tip: tap near the stem end, as this is where the seeds are most concentrated.
For the ground spot check, focus on the bottom of the watermelon, where it rested on the soil. As the fruit ripens, it absorbs nutrients and changes color from white or pale green to a creamy yellow or beige.
This color shift happens because the watermelon’s chlorophyll breaks down as sugars develop. If the spot remains white or green, the watermelon needs more time on the vine. Conversely, if it turns brown or mushy, the fruit may be overripe.
The curl test is often overlooked but is one of the most reliable indicators of ripeness. Look at the tendril closest to the watermelon stem—this is the vine’s last connection to the fruit.
When the watermelon is ready, this tendril will turn brown and crispy, almost like dried paper. If it’s still green and flexible, the fruit isn’t ripe yet.
This test works because the tendril’s job is to supply nutrients to the developing watermelon, and once the fruit is fully grown, the vine severs this connection as a signal to harvest.
Combining these three tests increases your accuracy by 90% compared to using just one method alone. For example, a watermelon might pass the thump test but fail the ground spot check—this discrepancy means it’s not fully ripe.
Similarly, if the curl test shows a brown tendril but the thump test sounds dull, the watermelon might be overripe. Always cross-reference these cues to make the best decision.
One common mistake is assuming size alone determines ripeness. While watermelons do reach their full size before ripening, a large watermelon isn’t necessarily sweet. For instance, seedless varieties like ‘Sugar Baby’ or ‘Crimson Sweet’ may look ripe but lack the deep red flesh and intense sweetness of heirloom types.
Always rely on the field tests rather than guessing based on appearance or weight.
If you’re growing watermelons in containers or raised beds, these tests still apply, but you may need to adjust slightly. For example, container-grown watermelons often ripen faster due to warmer soil temperatures, so monitor the curl test more closely.
Additionally, avoid harvesting watermelons that have been exposed to frost or extreme heat, as these conditions can alter the fruit’s texture and flavor.
Once you’ve confirmed ripeness using these tests, harvest your watermelon carefully to avoid bruising. Use a clean, sharp knife and cut the stem about 1 inch above the fruit. Let the watermelon cure in a dry, shaded area for 3-5 days before storing it.
This curing process allows the sugars to fully develop, resulting in a sweeter, more flavorful watermelon. With these methods, you’ll never again wonder, “Is my watermelon ready?”—you’ll know
How climate and variety affect watermelon ripening timelines
Your local climate and the watermelon variety you grow play huge roles in determining the perfect harvest timing. In hot, dry climates like Arizona or California, watermelons often ripen 2-3 weeks faster than in cooler regions like the Pacific Northwest.
Meanwhile, seedless varieties typically mature slightly earlier than heirlooms, but their sweetness peaks differently. Understanding these factors helps you avoid the frustration of overripe melons or underripe disappointments.
For example, in USDA Zone 9 (like Florida or Southern Texas), watermelons planted in April may be ready by late June, while in Zone 5 (like Minnesota), the same varieties might not ripen until late August.
Even within the same zone, microclimates—like a sunny hillside versus a shaded valley—can shift ripening by 10-14 days. Always adjust your expectations based on your specific growing conditions.
| Variety Type | Days to Maturity | Peak Ripeness Window | Climate Notes |
|---|---|---|---|
| Seedless (e.g., 'Sugar Baby', 'Crimson Sweet') | 60-75 days | Late July-August (Zones 7-10) | Sweeter in high heat; may crack in humid climates |
| Heirloom (e.g., 'Moon and Stars', 'Charleston Gray') | 80-90 days | August-September (Zones 5-9) | Better flavor in moderate heat; needs longer growing season |
| Slicing (e.g., 'Jubilee', 'Calhoun Gray') | 70-85 days | Late July-September (Zones 6-10) | Thicker rinds; drought-tolerant varieties ripen faster |
| Mini/Personal (e.g., 'Tiny Tim', 'Sugar Shot') | 50-60 days | June-July (Zones 7-10) | Ideal for short seasons or container growing |
If you're growing seedless watermelons, pay close attention to temperature fluctuations. These varieties often stop sweetening if nighttime temps drop below 70°F (21°C). In cooler climates, like the Midwest, consider planting early-maturing varieties like 'Sugar Baby' or using black plastic mulch to warm the soil.
For heirloom types, prioritize soil health—well-composted beds can shave off 5-7 days from ripening time.
Another key factor is daylength. Watermelons in northern latitudes (like Maine or Canada) benefit from longer daylight hours in summer, which speeds up ripening. Conversely, in tropical climates (like Hawaii or Puerto Rico), consistent 12-hour days can delay maturity unless you choose tropical-adapted varieties like 'Carolina Cross'.
Always check your seed packet for climate-specific recommendations.
Finally, adjust your expectations based on whether you're growing in ground beds or containers. Potted watermelons (like dwarf varieties) may ripen 1-2 weeks earlier due to warmer root zones, but they’re also more sensitive to temperature swings.
In hot desert climates, shade cloth can prevent sunburn and extend the harvest window by 10-14 days.
By aligning your variety choice with your local climate and growing conditions, you’ll consistently harvest watermelons at their peak sweetness—no more guessing or wasted effort. 🌱☀️