
Tools
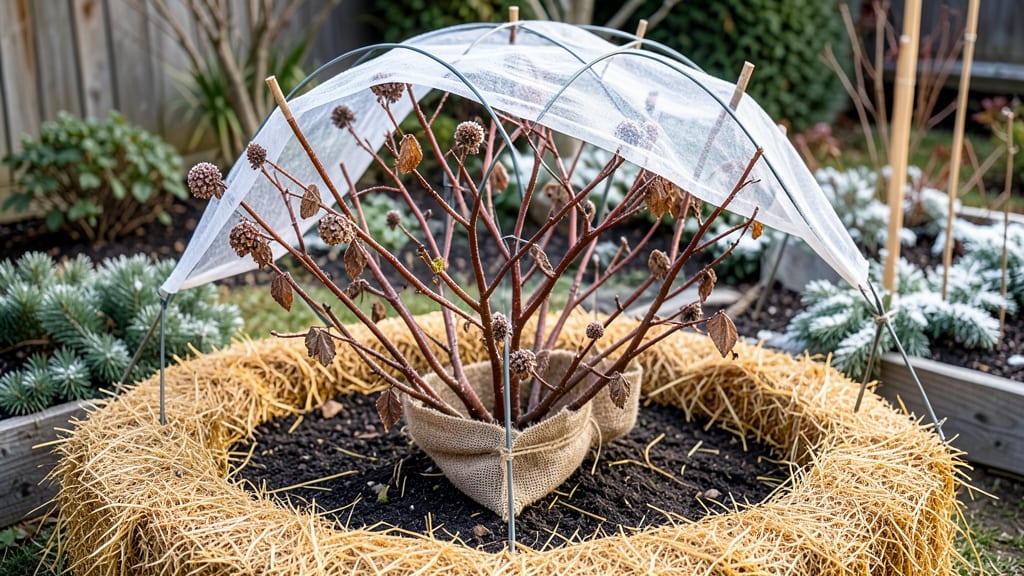
Winter protection for the garden is the key to keeping plants alive and thriving through the coldest months.
Freezing temperatures don’t have to mean the end of your garden—smart winter protection can save your plants and extend their lifespan for years to come.
Whether you’re dealing with tender perennials, young shrubs, or even your garden tools, the right insulation and covers make all the difference. A little prep now means healthier growth when spring arrives.
Below, I’ll walk you through the best materials, step-by-step wrapping techniques, and even some budget-friendly DIY hacks to keep your garden safe all winter long.
How to choose the best cold-hardy wraps for different plant types
Winterizing your garden isn’t just about throwing a blanket over everything—it’s about matching the right cold-hardy wrap to each plant’s unique needs. Whether you’re protecting delicate perennials in Zone 5 or insulating young fruit trees in Zone 8, the wrong material can cause more harm than good.
Let’s break down the best wraps for different plant types and hardiness zones.
Not all winter wraps are created equal. Some materials trap too much moisture, while others offer zero insulation. For example, burlap sacks work well for woody shrubs because they allow airflow, but they’re useless for tender annuals like basil.
Meanwhile, frost cloth (a lightweight, breathable fabric) is perfect for vegetable gardens in Zone 6-7, where temperatures dip just below freezing.
Here’s how to choose the right wrap for your garden’s specific needs:
For perennials like lavender or salvia, which thrive in Zones 5-9, a combination of straw mulch (3-4 inches) and a lightweight frost cloth works best. The mulch insulates roots, while the cloth blocks sudden temperature drops.
Meanwhile, young fruit trees in Zone 6 need a sturdier approach—wrap the trunk with burlap and add a tree guard to prevent rodent damage.
If you’re in Zone 8 or higher and dealing with tender tropical plants like hibiscus or citrus, bubble wrap can be a lifesaver—just pair it with a small heat source (like a grow light) to simulate warmth.
For potted plants, move them to a sheltered spot and wrap the pots in insulated blankets to prevent freezing.
One common mistake? Using plastic sheeting. While it might seem like a cheap solution, it traps moisture and can suffocate plants. Instead, opt for breathable materials that allow for airflow while still providing insulation.
For example, cardboard boxes (cut to size) work surprisingly well for small shrubs in Zone 5, as long as you leave ventilation holes.
Pro tip: Always secure wraps tightly but gently to avoid damaging stems. Use twist ties, clothespins, or stakes to keep everything in place. And remember—remove wraps in early spring once temperatures stabilize to prevent overheating. Your plants will thank you with a stronger, healthier growth cycle next season.
🌱 With the right wrap, even the harshest winter can’t stop your garden from thriving.
Step-by-step guide to wrapping plants for winter survival
Wrapping plants for winter survival is one of the easiest ways to protect your garden from freezing temperatures and harsh winds. The key is timing—wrap plants before the first frost hits, but after the ground has cooled slightly.
This gives roots time to harden off while still shielding them from sudden cold snaps.
Not all plants need wrapping, though. Focus on tender perennials, young trees, and shrubs in zones 5-7, as these are most vulnerable to frost damage. For example, hydrangeas and roses benefit greatly from insulation, while evergreens often need protection for their foliage.
- 1. Choose the right material: Use burlap for sturdy plants, frost cloth for flexibility, or bubble wrap for extra insulation. Avoid plastic, which traps moisture and can rot stems.
- 2. Water plants thoroughly 1-2 days before wrapping. Well-hydrated plants handle cold better, and moist soil insulates roots naturally.
- 3. Secure the base first. Pile mulch (4-6 inches) around the plant’s base to protect roots. For potted plants, move them to a sheltered spot or wrap the pot in insulation.
- 4. Wrap stems and branches. Start at the bottom and spiral upward with your chosen material, leaving 1-2 inches of space at the top for airflow. Use twine or clips to secure loosely—too tight can damage bark.
- 5. Add extra protection for evergreens. Spritz foliage with water before wrapping to prevent desiccation. For large trees, use tree wrap or burlap to shield trunks from sun scald.
- 6. Check wraps monthly. Remove and reapply if snow or ice accumulates, as weight can break branches. Ventilate on mild days (above 40°F) to prevent mold.
One common mistake is wrapping too early or too late. If you wrap before the first frost, plants may overheat or develop fungal issues from trapped moisture. Conversely, waiting until after a hard freeze can leave plants damaged. Aim to wrap when nighttime temps drop to 35-40°F consistently.
Another pitfall is poor airflow. While insulation is crucial, plants still need to breathe. Use lightweight materials and avoid sealing wraps completely. For example, frost cloth allows light and air to pass through while blocking wind. If you notice condensation inside the wrap, loosen it slightly to prevent rot.
Don’t forget to remove wraps in early spring, usually when daytime temps stay above 50°F. This prevents overheating and allows plants to acclimate naturally.
For evergreens, remove wraps gradually to avoid sunburn on newly exposed foliage. With the right technique, your plants will bounce back stronger and healthier come spring!