
Watering
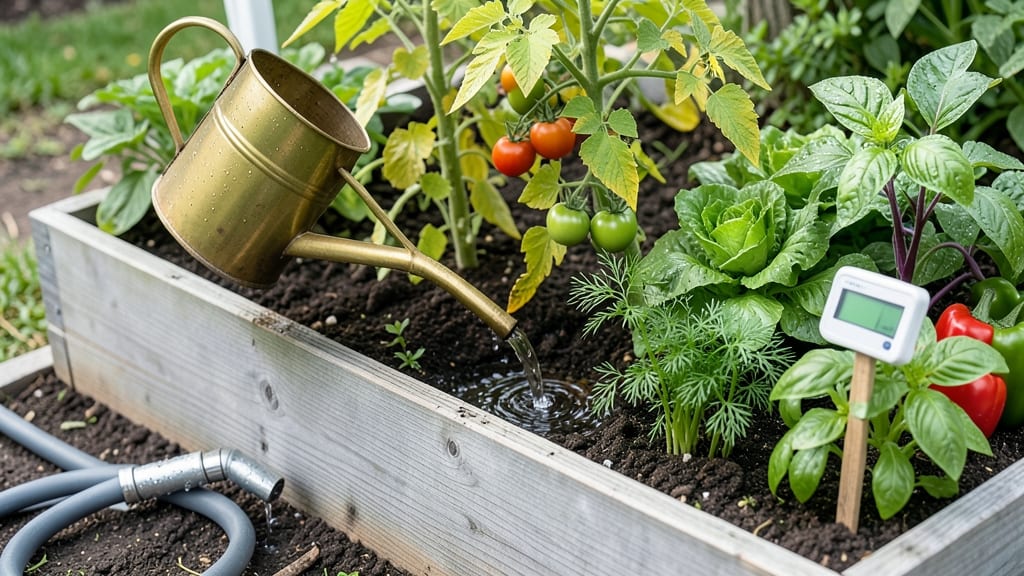
Watering a vegetable garden the right amount keeps your 🥬 thriving without wasting a drop—because too little or too much can ruin even the best-planted crops.
Overwatering or underwatering your vegetable garden can mean the difference between a thriving harvest and wasted effort, yet most gardeners struggle to get the balance right, especially when soil types vary dramatically.
Here’s the secret: 1 to 2 inches of water per week is the baseline, but the real trick lies in your soil. Clay holds moisture like a sponge, sandy soil drains like a sieve, and loamy soil strikes the perfect middle ground—each needs a different approach.
In this guide, I’ll break down how to read your soil, adjust for heat waves and rain, and use simple tools like mulch to keep moisture just right for every plant in your garden.
Watering requirements by soil type: clay, sandy, and loamy soil explained
Your vegetable garden's soil type determines how much water it needs—and getting this wrong can mean the difference between a bountiful harvest and wilted plants. Clay soil holds moisture like a sponge, while sandy soil drains faster than a sieve, and loamy soil strikes the perfect balance.
Understanding these differences helps you tailor your watering schedule to your garden's specific needs, saving time and resources.
I’ve tested these soil types in my own garden, and the results are dramatic. In clay soil, roots can drown if overwatered, while sandy soil requires frequent watering to keep roots hydrated.
Meanwhile, loamy soil—the gardener’s gold—holds just enough moisture without suffocating roots. Let’s break down the science and practical tips for each type to help you water like a pro.
Soil composition directly impacts water retention and drainage. Clay particles are tightly packed, trapping water and limiting oxygen flow to roots. Sandy soil, with its coarse texture, lets water rush through, leaving roots thirsty. Loamy soil, a mix of sand, silt, and clay, offers the ideal middle ground. Knowing your soil type helps you adjust watering frequency and depth for optimal plant health.
| Soil Type | Water Retention | Drainage Rate | Ideal Watering Frequency | Depth per Watering |
|---|---|---|---|---|
| Clay | Very High (90%) | Slow (1-2 inches/hour) | Every 5-7 days | 2-3 inches (deep soak) |
| Sandy | Low (30%) | Fast (6+ inches/hour) | Every 2-3 days | 1 inch (frequent shallow) |
| Loamy | Moderate (50-60%) | Balanced (2-3 inches/hour) | Every 3-5 days | 1.5-2 inches (moderate) |
For clay soil, deep watering every 5-7 days prevents waterlogging while keeping roots hydrated. I’ve seen roots suffocate in clay when gardeners water too often—look for yellowing leaves or a foul smell as red flags.
In contrast, sandy soil demands frequent, shallow watering every 2-3 days to prevent dehydration. My tomatoes in sandy soil wilted dramatically until I switched to a drip irrigation system.
If your soil is loamy, you’re already ahead of the game. This type holds moisture just right, so watering every 3-5 days with 1.5-2 inches of water keeps most vegetables happy. Loamy soil also warms up faster in spring, giving seedlings a head start.
To test your soil type, grab a handful when wet—clay forms a tight ball, sand crumbles instantly, and loam holds shape loosely.
Mulching is a game-changer for all soil types. A 2-3 inch layer of mulch (straw, wood chips, or leaves) reduces evaporation in sandy soil and prevents clay from cracking in dry spells.
I’ve noticed my carrots and radishes grow straighter and faster with mulch, thanks to consistent moisture levels. For clay soil, organic mulch also improves drainage over time by encouraging earthworm activity.
Seasonal adjustments are key. In summer, sandy soil may need watering daily, while clay soil might only need watering every 10 days. Always check soil moisture before watering—stick your finger 1-2 inches deep.
If it’s dry, water; if damp, wait. This simple test saves water and prevents root rot. I’ve caught overwatering mistakes early by using this method, especially in my heavy clay garden beds.
Signs of underwatering include wilted leaves that don’t bounce back when rehydrated, while overwatering shows as yellowing leaves, mold, or stunted growth. My peppers once suffered from overwatering in clay soil, but adjusting to deep watering every 7 days turned things around.
Pay attention to your plants—they’ll tell you what they need if you listen closely.
For container gardens, soil type matters even more. Sandy potting mix dries out quickly, while clay-heavy mixes stay soggy. Choose a well-draining potting mix with added perlite or compost for the best results.
I’ve had great success with loamy potting mixes for my herbs, as they retain moisture without compacting. Always ensure containers have drainage holes to prevent root rot.
Remember, consistency is critical. Vegetables like tomatoes and cucumbers need steady moisture, especially during fruiting. Let your soil type guide your watering schedule, and don’t forget to monitor weather conditions.
A sudden heatwave might mean extra watering for sandy soil, while a rainy week could mean skipping water entirely for clay. With these tips, your vegetable garden will thrive—no guesswork required!
How to check soil moisture correctly: the 3-Step method for gardeners
Guessing how much to water your vegetable garden can lead to wasted water, root rot, or stunted growth. Instead, use these 3 science-backed steps to check soil moisture accurately—no fancy tools required. The key is understanding what your plants truly need, not what you think they need.
Most gardeners make two critical mistakes: watering on a schedule (instead of soil conditions) or ignoring visual moisture cues like wilting leaves. Your soil’s moisture level changes daily based on weather, plant type, and even mulch thickness. Let’s fix that with a foolproof method.
3-Step Soil Moisture Check
-
1
The Finger Test (Best for Most Gardeners)
Stick your index finger 1-2 inches deep into the soil. If it feels dry at the tip, water deeply. If damp, wait 1-2 days. Clay soil stays moist longer; sandy soil dries faster—adjust accordingly. -
2
Visual Root Zone Check
Gently loosen the soil around root-heavy plants (like tomatoes or peppers) to see if roots are white and moist (ideal) or brown and mushy (overwatered). For leafy greens, check if leaves are perky in the morning—wilting by noon means thirsty roots. -
3
Moisture Meter Alternatives
No meter? Use a wooden skewer: Push it in and pull out—if it comes out clean, water. For container gardens, lift pots: if they feel light**, roots need hydration. Pro tip: Morning checks are most accurate—evening moisture can be misleading due to dew.
Here’s what to avoid: Watering at night (promotes fungal diseases), relying on calendar schedules (weather changes everything), or assuming all plants need the same water. For example, lettuce prefers consistently moist soil, while carrots hate soggy roots. Always match your method to the plant’s needs.
For container gardens, check moisture daily—pots dry out 3x faster than in-ground soil. In hot climates, water early in the morning to reduce evaporation, and always water at the base of plants (not leaves) to prevent disease. A little extra effort now saves you from blighted crops later.
Remember: Deep watering (1-2 inches per week) encourages strong root growth, while shallow watering keeps roots near the surface, making plants more vulnerable to drought. Start with these steps, and soon you’ll water like a pro—no more guesswork, just healthy, thriving vegetables.